Discover Vectary Business solutions for electronics companies
Get a quick guided product tour. Your questions - answered.

A good PCB (printed circuit board) design is the basis of every electronic device. Companies specializing in printed circuit board design should use the latest technologies and processes to deliver the best results. By using a PCB configurator, the manufacturers can quickly visualize material changes and the impact of the design for any new product release. The marketing teams can also benefit from having an embed on the site showing the new design.
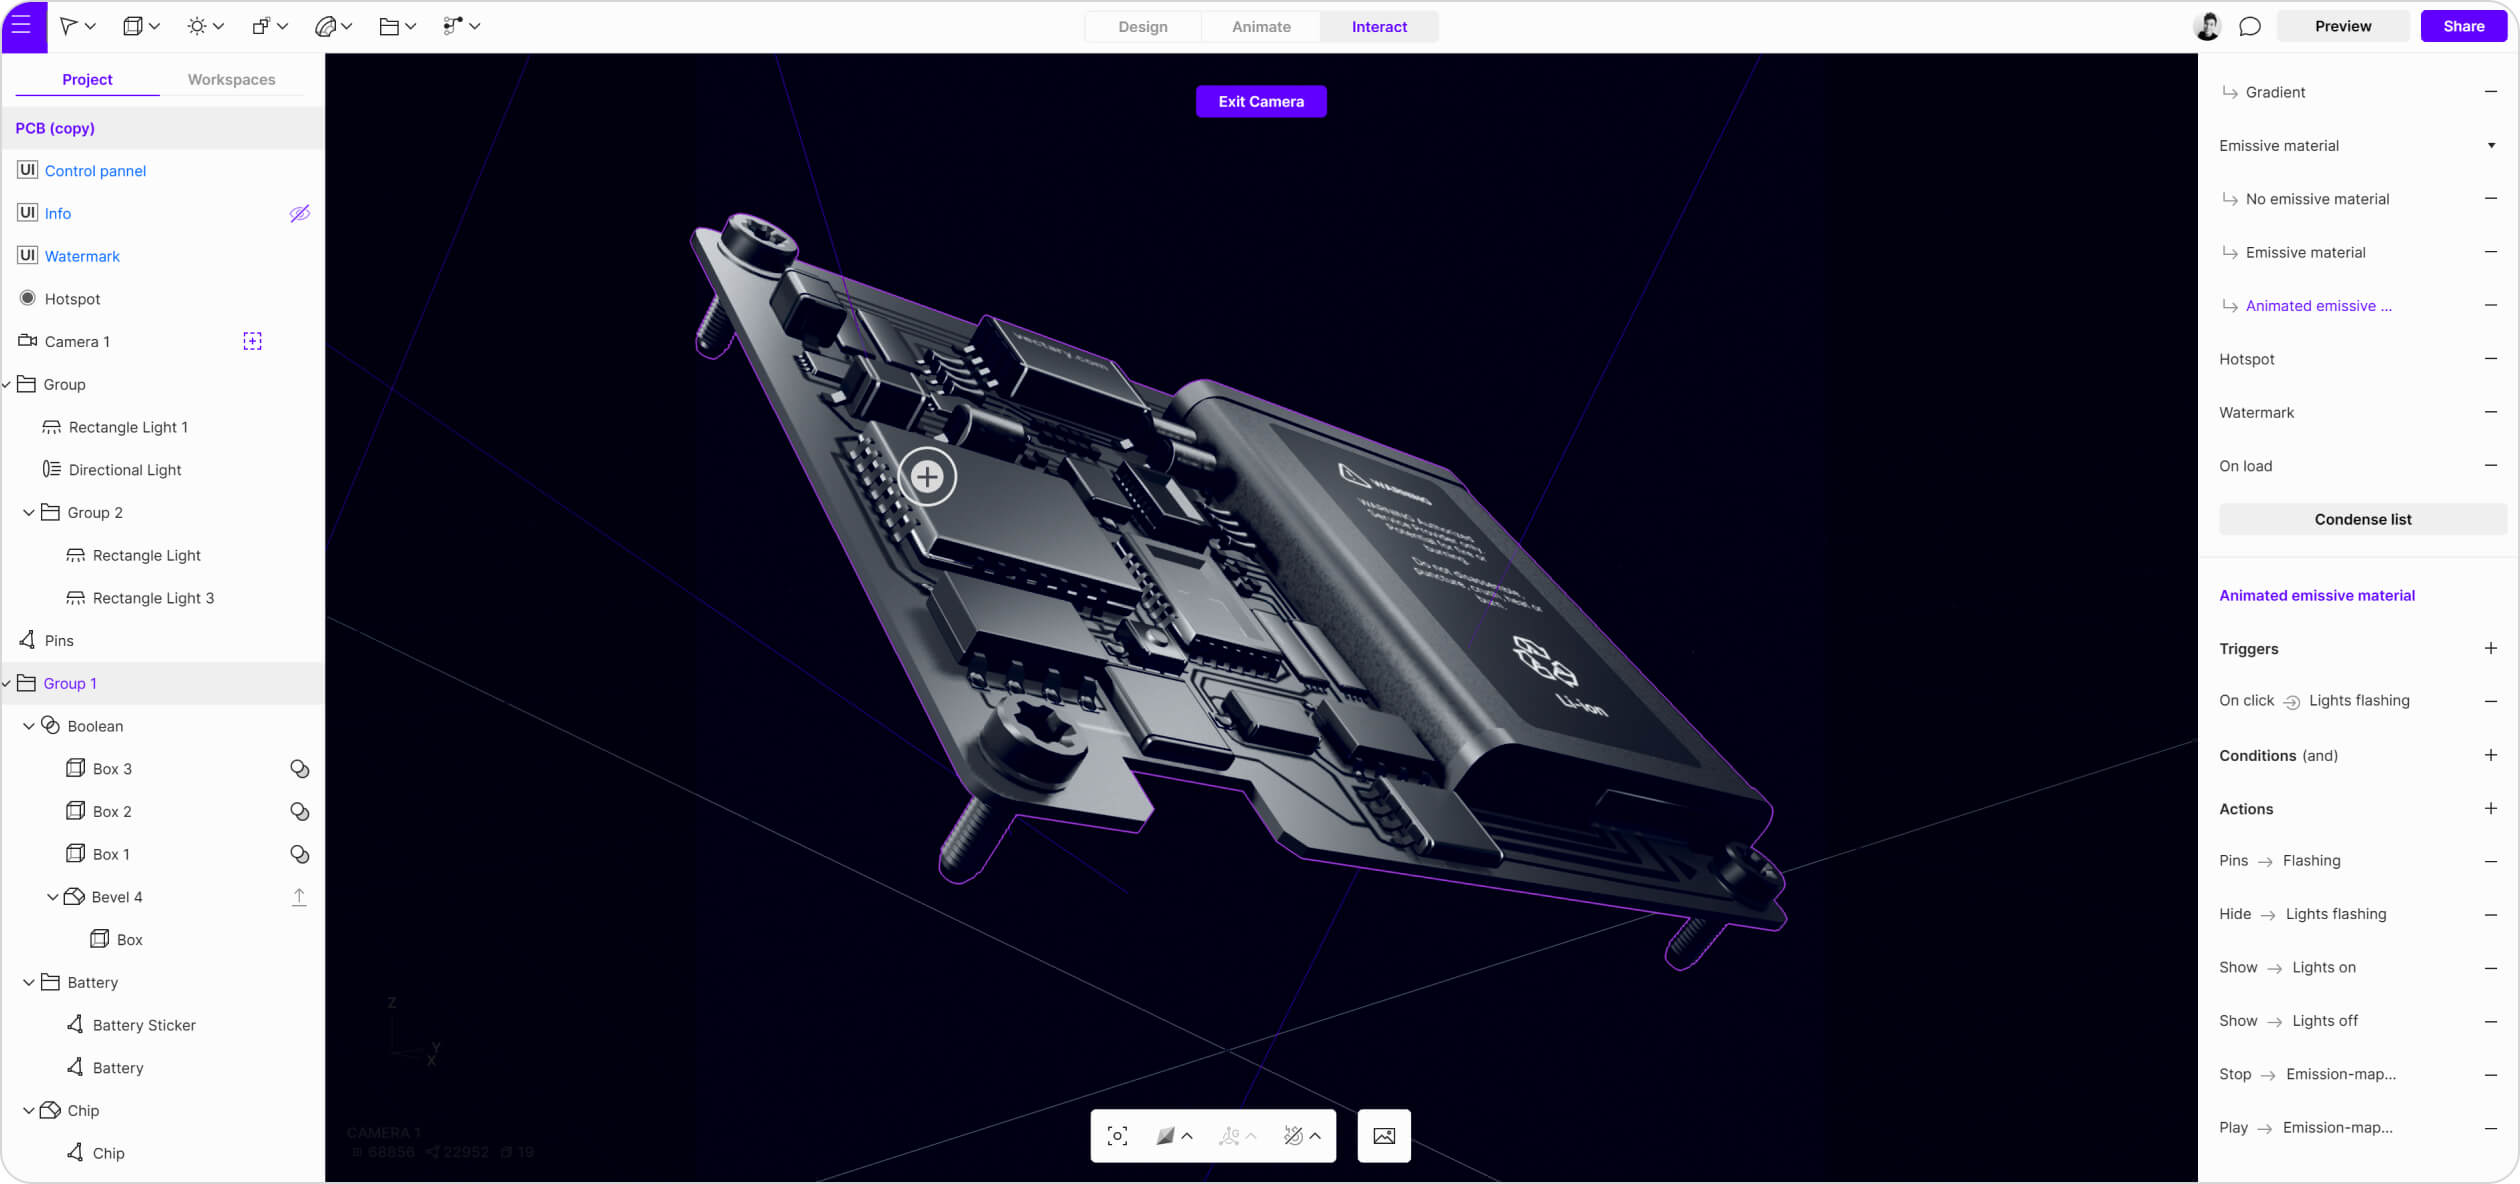
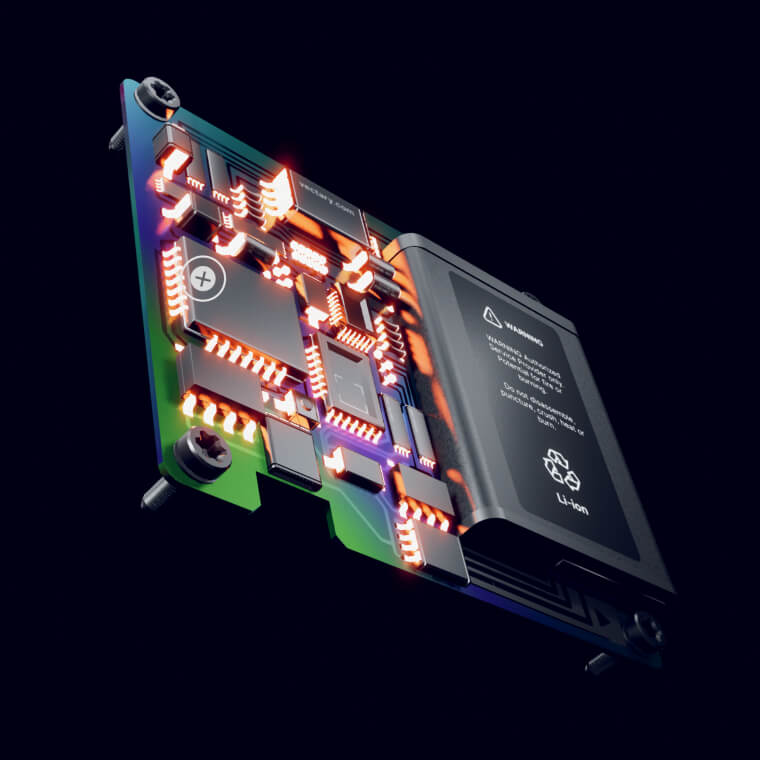
The goal of this PCB configurator is to showcase different possibilities focusing on using emissive materials where one can select between an animated emissive material, constant emissive material or a non-emissive one. Interactions happen through the additional Floating UI icons.
Floating UI needs to:
The goal was to visualize the data flow from the chipset unit to the other components of the PCB. The dark materials were chosen to enhance the visibility of the animated emissive material. The bloom effect was applied to further emphasize it.
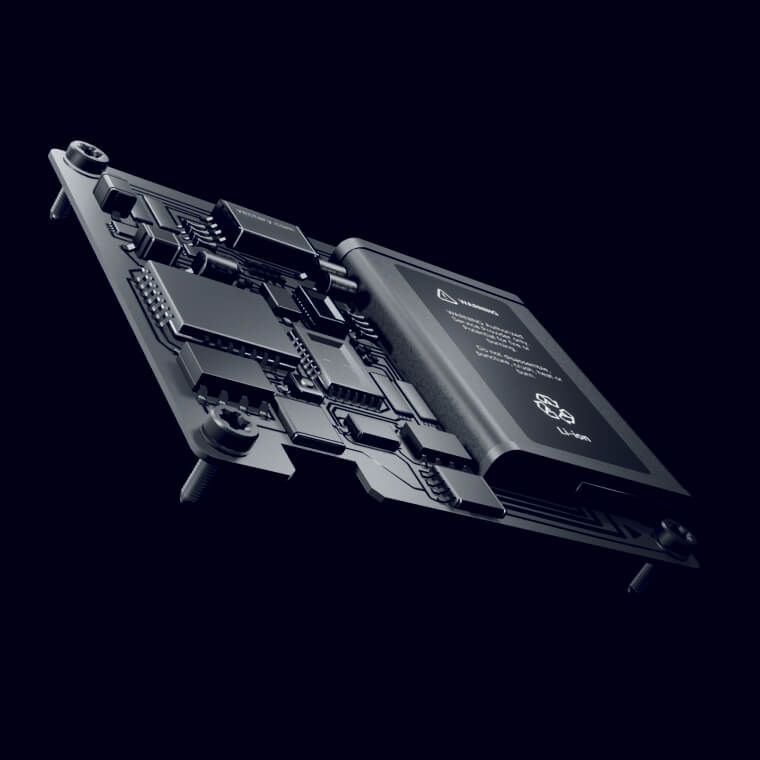
The model was prepared in 3ds Max. The textures were unwrapped and prepared in Substance Painter. It was important to showcase the small connections between all components of the board to enhance realism.
A dark color palette was selected for all the different parts of the PCB unit. When working with dark materials in a dark environment, it’s crucial to experiment with various types. There is a great variety of contrasts between metallic and plastic materials. Another important parameter is the roughness, which affects how light diffuses on the surface. You can enhance the look and feel with a couple of textures, primarily in the roughness or metallic channels, such as noise.
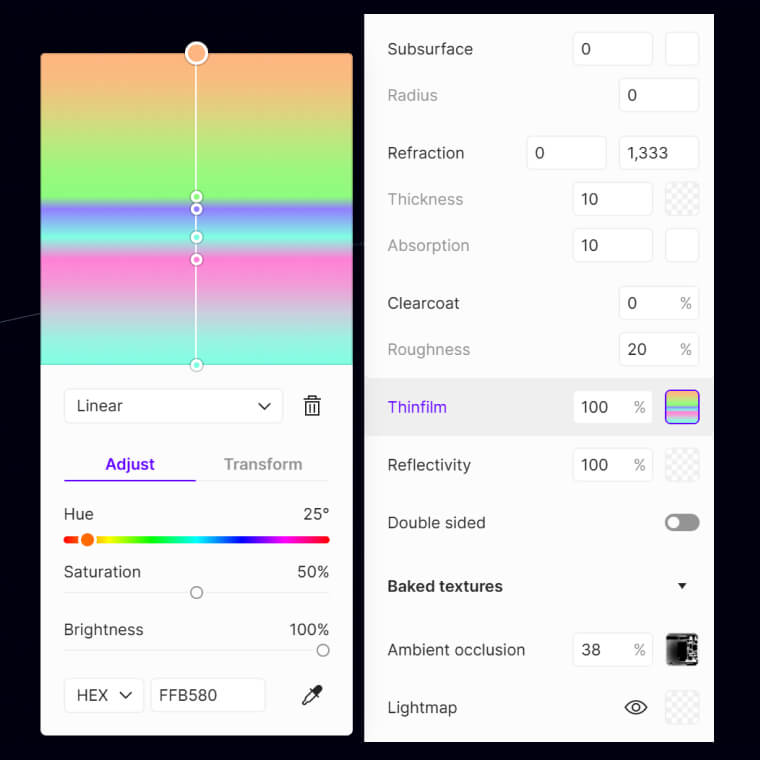
For the main body component of the PCB, a material with thin film is one of the best options. Thin film is located in the Advanced Materials settings. We would suggest exploring how different gradient colors can affect the final look of the material.
The animated material was created in Adobe After Effects and imported as Lottie file. It uses plane projection to fit all of the components.
There wasn’t much baking done in this project since everything was already quite dark and the shadows were sufficient.
For detailed realistic projects on a small scale, an important part of the design is stickers, such as the information on the battery or chipset units, which add complexity.
A default HDRI was used, set to an intensity of 30% with modified parameters. Altogether, there are four lights:
The main goal was to get nice reflections from every angle to make the dark surface contrast well against the black background.
There are two groups of interactions:
For the emissive materials of the pins, there is an on-load interaction that triggers an animated texture to play on repeat. With the floating UI, you can then select a constant emissive material or turn it off by switching to a dark material. Interactions use on-click material change and visibility with show/hide actions.
Tip: Clicking the icon with the color gradient swatch triggers a material change but also hides the gradient icon swatch and shows the black color swatch. Clicking the black color swatch hides itself and shows the color gradient swatch. This way, you can create a simple loop where you can always choose the next available option. The same principle applies to the emissive materials; you just hide and show more icons.